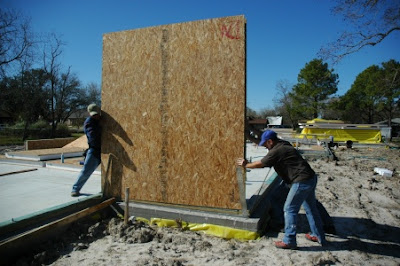
When building with SIPs, you start by putting 10-inch L bolts around the perimeter of the foundation (every 2 to 4 feet) and hurricane straps in the corners. The L Bolts stick up 4 inches out of the foundation.

Then a treated wood plate is glued to the foundation with the L bolts sticking through. A nut and large washer are used to hold down the plate, also.

The SIPs are pre-cut to fit over the plate. The SIP in the below photo has a 2X6 board attached to support the window it is going to hold.

If a SIP buttes up next to another SIP, a spline is glued and stapled between the panels. The yellow stuff is expandable foam - it's used to make sure there is no air flow between the panels.

Next, glue is put on the sides of the plate and a bead of expandable foam is put on top of the plate. Then the SIP panel is raised and put over the top of the plate. The SIP is moved into place and stapled to the plate.


You start in one corner and work your way around the perimeter of the house - making sure every SIP is level and exactly in place. At the corners, the SIPs are screwed together with 8-in. screws.
This looks easy, but one mistake and every other SIP is in the wrong place - and trying to remove a SIP that has already been glued and stapled is not easy. If done right, the walls go up very quickly.
Hopefully all of the first floor walls will be up by Fri. evening.
After the first floor SIPs are up, the next step is to frame the interior walls and get the floor joists in place.
More later..
No comments:
Post a Comment